Premier Isolation Cabinets and Niche Musical Devices
AxeTrak® Guitar Pickup Tester / Sampler
Finally . . . A no hassle, quick and easy way to audition and test pickups on your electric guitar
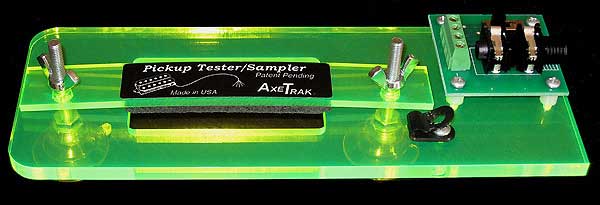
U.S. PATENT 9,093,058
Our Guitar Pickup Tester lets you easily test and audition guitar pickups on your guitar
♦ No need to change, remove or even loosen your strings
♦ Terminal block eliminates the need of a soldering iron to connect your pickup under test. Pickup stays in new unused condition.
♦ No reason to remove your pickguard and/or pickup ring to access critical wiring
♦ No need to remove back-plate on guitar to access critical wiring.
♦ Tester mounts quickly and easily anywhere on the smooth finished surface of guitar
♦ Lets you quickly audition series, parallel and split coil wiring configurations on mulit-wire pickups with our 3-way switch mounted on circuit board
How does it work?
This device works on the principle that it doesn’t matter if the pickup is mounted under the stings or above the strings, as long as the distance between the pickup and the strings is the same, you will get the same results. Our guitar pickup tester simply mounts the “pickup under test” upside down, like a bridge directly over your strings instead of under your strings. This device has special leveling feet with suction cups attached so that you can easily adjust the height of your pickup in relation to the strings. This unique design allows the user the same flexibility they would have if the pickup was mounted conventionally under the strings. The suction cups also provide a quick, convenient way for the user to attach the tester anywhere on the smooth surface of the guitar. For a detailed explanation of how to use this device continue reading below.
How To Setup
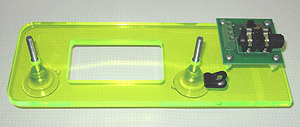
The first step to testing a pickup is to mount the pickup upside down, securely on the test fixture. This is done by removing the pickup mounting plate (small acrylic strip that has company label), and the two wing nuts (thumbscrews). Do a preliminary adjustment to the height of suction cup leveling feet so that the pickup will float above the strings. Final height adjustment will be made just before tester is mounted onto the guitar.
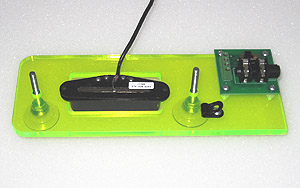
Place the pickup that you would like to audition on the base of tester, face down. Make sure that the orientation of the pickup is the same direction it would be if you were permanently mounting it on the guitar. (In other words, the side of the pickup that would normally be under the low E string should now be over the low E string. This is much more critical on pickups with varying pole heights.) Center the pickup in the cutout space so that when you place the pickup mounting plate back on the tester, the pickup will still be centered. Now place the pickup mounting plate on the two leveling suction cup studs and lightly tighten the two wing nuts (thumbscrews) just tight enough to hold the pickup in place. Do not over tighten.
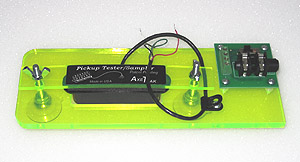
Carefully pull the pickup wire onto the cable clip as this will help hold the wire in place. Check your pickup wiring diagram or check your pickup manufacturer’s website so that you will know how to correctly wire the leads to the terminal block. It is important that you do not over tighten these screws on the terminal block.
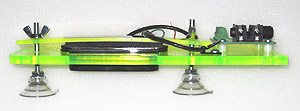
The acrylic base on the Guitar Pickup Tester has threaded aluminum inserts. These inserts allow for infinite height adjustments of the leveling suction cups by turning them either clockwise or counterclockwise. They should be adjusted so that the pickup sits at the desired distance from the strings.
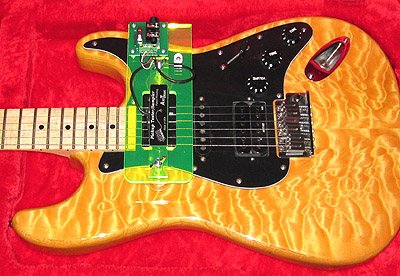
With the tester now ready to be mounted on the guitar, hold it where you would like to mount it and verify that the pickup height is set how you want it. After you are satisfied with the height that the pickup will float over the strings, plug in a lightweight guitar cable into the output jack of the tester. Put the tester in place and gently press down with firm pressure close to the threaded leveling suction cups. Guitar surface should be clean from dust and oil for best suction. For pickups that have 4 conductors and a ground wire, the 3 position slide switch mounted on the circuit board will allow you to test split coil, parallel, and series wiring configurations.
